The Import Issues page is available to Project Administrators via the Admin menu. The page allows a CSV, JSON, or XLS file to be uploaded. After successful upload issues will be created according to the specifications in the file.
This page may be used in conjunction with the Export functionality available in Company Administration which would allow administrators to move issues from one project to another.
Project Administrators can download the project-specific template, via the Download Template CSV button, which can be used to import field data where each imported row will create a new Squish issue. The import is ideal for creating multiple issues related to a specific milestone, task, or event. For example, an administrator may want to create several issues to track all the sub-tasks associated with an upcoming software release, such as announcements, regular regression test checks, or documentation produced for all releases.
Note: The Issue ID field is not required to be included in an import submission file. If you do include an Issue ID, then Issue IDs for all subsequent issues created in this project will continue numbering from the highest Issue ID that exists in the project. This may result in available Issue IDs being skipped.
To import issues:
- Create a file listing issues to be imported. This can be done in the following ways:
- A Company Administrator can export existing issues from a different Squish project via the Admin > Export tool.
- A Project Administrator can use the Download Template CSV button on the project’s Admin > Import Issues page to download a correctly formatted template. From there, issue properties can be added such that each separate issue is represented by a row in the CSV.
- Navigate to the project’s Admin > Import Issues page. Select the import file and click Upload.
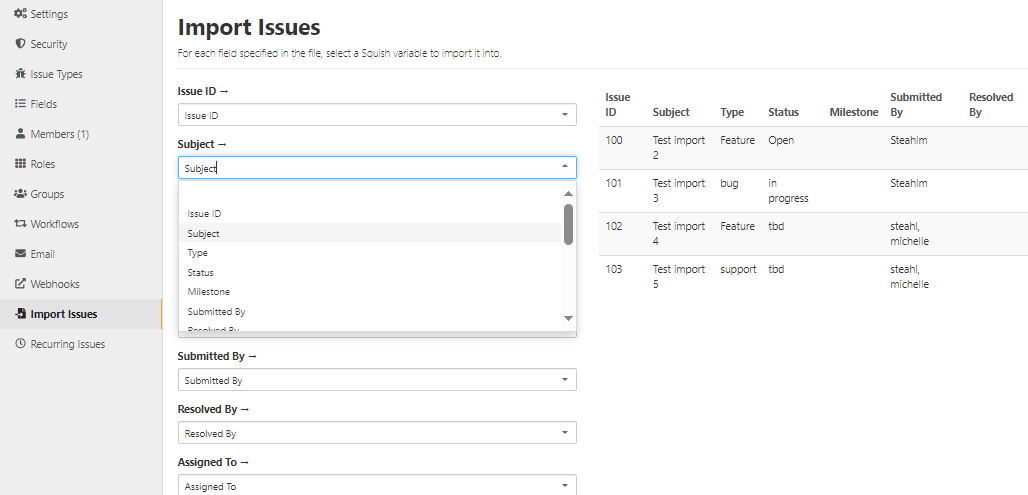
- Map the import file column headers to existing fields in the Squish project:
- The page that opens will display a list of fields in the uploaded file along with the matching field in the Squish project, if a match was found. Additionally, the page displays a table of data found in the file for reference.
- If a column is mapped to an incorrect Squish field or mapped to no Squish field, choose the correct field from the corresponding drop down. If no field is selected, then the data in that column will be ignored.
- Click the Check Conflicts button.
- The Resolve Import Conflicts page opens displaying any conflicts between data in the import file and field values that existing in Squish.
- Any field values present in the import file which are in conflict with allowed data formats in Squish for the field that column is mapped to as displayed on this page.
- Choose the appropriate value from the drop down for any conflicting values. Squish may select a matching value by default.
- If you have mapped the Issue ID field, then a checkbox to Renumber duplicate Issue IDs is available. If this box is unchecked, rows in the import file which include an Issue ID that already exists in this Project will not be created. If the box is checked, then those issues will be created and new Issue IDs will be assigned to them.
- A Send a submit digest email checkbox is available. Checking this box will send a single email to users with the Notify on Submit role permission for all imported issues. Leaving the box unchecked will result in no emails being sent.
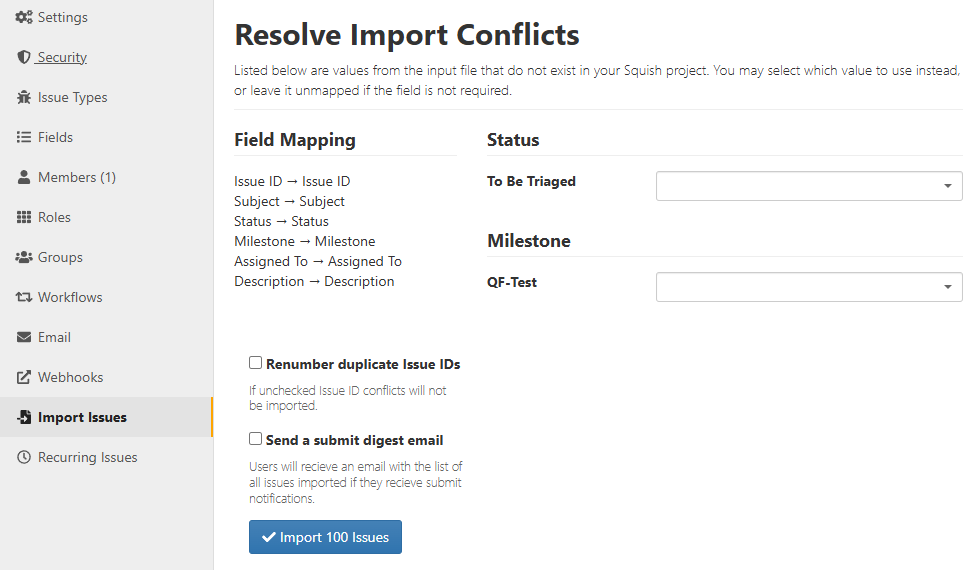
- Select the Import # Issues button to finish the import. You will be redirected to the project home page and the import will be completed in the background.