Updating Issues
The main section of the screen contains the discussion on the issue. To save space on the screen, there is a Membership Setting accessible via Project > Settings that lets the user determine how many comments to display on an issue. If all comments are not displayed, clicking Load remaining # comments will display all of the comments.
If history is recorded for fields and changes have been made to those fields, the information on what was changed will be displayed in the comment boxes. If things were changed for an issue, but no comment was made, the changes are listed without a comment.
You can preview how a comment will look by selecting the Preview tab at the top left of the Comments box. This will allow you to make sure that you have used the formatting tags correctly. Select the Write tab to return to edit mode.
To update an issue without leaving the page, hold the Shift keyboard key, then the Update Issue button will become the Save Issue button. Click Save Issue and your updates will be saved without leaving the issue. If you close the browser tab or your session expires while a comment is being drafted, then Squish will remember it and display the text in the comment box for that issue if you are using the same browser. Clearing the browser’s cache will remove any comments being remembered this way.
Making Changes to Existing Comments
Individual comments can be manipulated in several ways. Clicking the timestamp link for an issue will update the page URL to specifically reference the corresponding comment. That comment will be displayed as close to the top of the screen as possible when using that link to view the page.

Several options are available under a comment's menu.
- Delete - You can delete your comment if it is the last one in the list. Select Delete to remove a comment. Select Delete Comment to confirm your action. If you change your mind, select Cancel. Once you have updated the issue, the comment is permanently removed. If you have a role that has Manager permissions, you can delete the last comment entered no matter who entered it.
- Edit - To edit a comment that you entered, select Edit. When editing a comment, you have the ability to remove and add attachments. To remove attachments, click on the X next to the attachment(s) you want to remove. Select Save Changes when all changes have been made. If you change your mind, select Cancel. Once you have updated the issue, the changes are permanent. Updated comments have a link noting the number of times the comment has been updated. This link opens a dialog displaying a printable history of changes made to the comment. If you close the browser tab or your session expires while a comment is being edited, then Squish will remember it and display the text the next time you edit that comment if you are using the same browser. If you have a role that has Manager permissions, you can edit all comments.
- Quote - You can quote a previous comment in an issue by selecting Quote. The full comment will be inserted in the Post a Comment field with the [quote author= ] [/quote] formatting tags. You can remove parts of the quote manually if you do not want to include it in its entirety.
- Pin - A comment can be pinned via the Pin option. This will ensure the comment is always visible to users viewing the issue, even if comments are collapsed.
- Copy link - The Copy Link option will copy a direct link to the selected comment. Navigating to this link will open the issue and automatically scroll to the comment.
Making Comments Collaborative
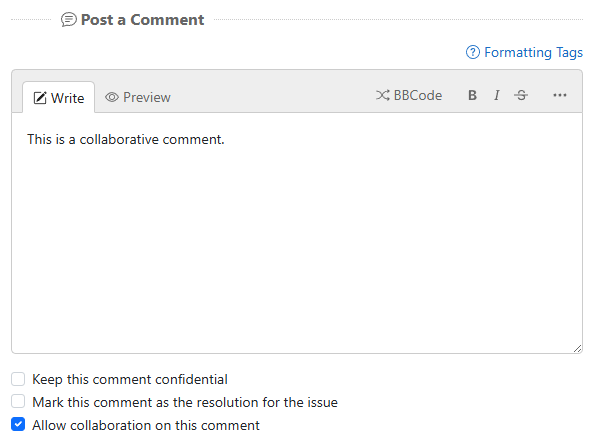
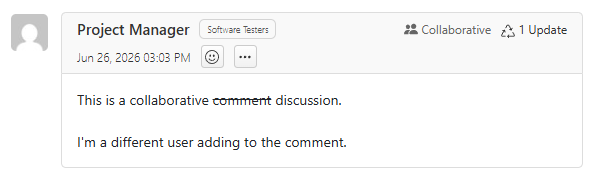
You can mark your own comments as collaborative, allowing other users to edit your comment. Check the Allow collaboration on this comment box underneath the comment box before you click Update Issue and this will add a Collaborative badge to the comment indicating that others who have permission to comment on the issue will have access to edit your comment.
Editing a Collaborative Comment
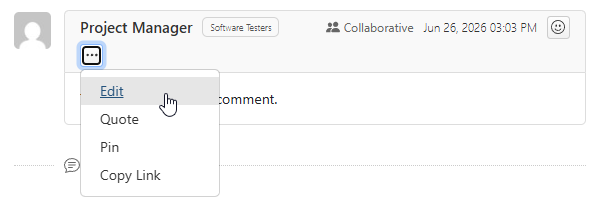
A comment marked as collaborative via the Collaborative badge can be edited by clicking on the “…” icon to open the dropdown menu and selecting Edit.
Reacting to Comments
Emoji reactions can be left on existing comments from the emoji menu or by clicking an existing reaction to the comment. Each user can react to each comment with any or all of the following emojis: Like, Dislike, Happy, Sad, Surprised, Celebrate, and Love.

When you react to a comment, the commenter may receive a notification email. Notification settings for emojis can be controlled for all projects from the My Account page or for individual projects from the Membership Settings page.
Using @mentions in Comments
Use @mentions to send specific users a notification about an individual comment without having to add the users to the notifications list for the whole issue.
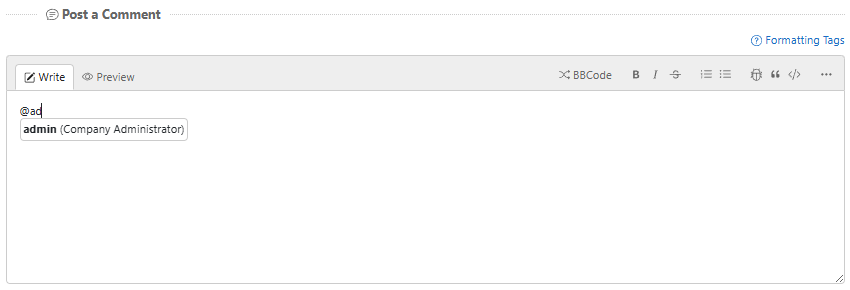
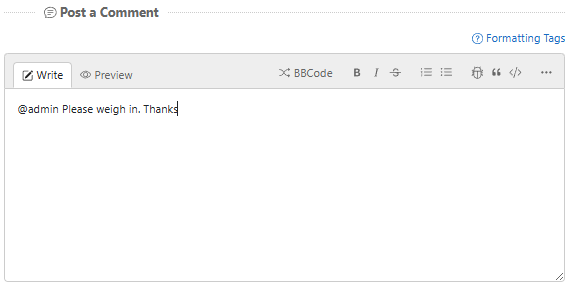
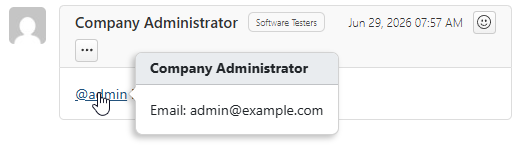
@Mentions are displayed as a link and, on hover, show the mentioned user’s name and email.

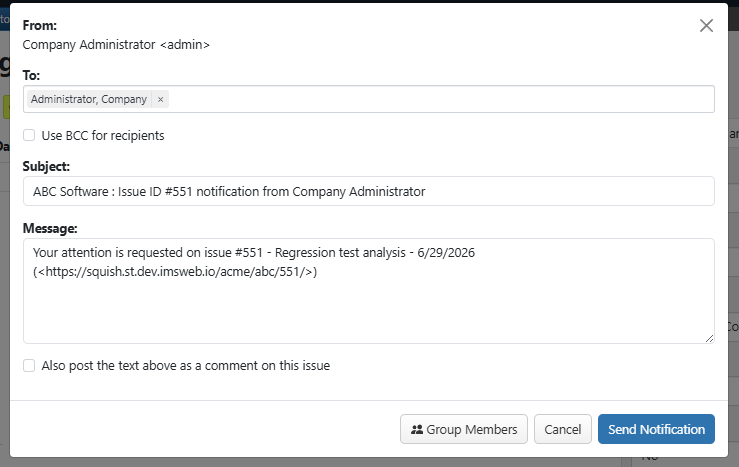
Clicking on the link will open a notify dialog wherein the user is pre-filled.
Changing Confidentiality of Comments
Comments that are marked as confidential will have a lock icon next to them. If a user cannot view confidential comments, the entire comment, including the lock icon, will not be visible.
If you edit a confidential comment, you can select the Keep this comment confidential checkbox to uncheck it. Select Save Changes to save the change to the comment.
Resolving issues
When submitting a new comment, or editing an existing comment, the Mark this comment as the resolution for the issue checkbox is available. Selecting this option will highlight the comment in the issue and add a "Resolution" tag to the comment next to the date/time. The text of that comment will be the Resolution field’s value in searches.