The Actions menu lists the actions you can perform on issues in the search results. Depending on the search criteria, your permissions, and the issues returned in the search, different actions may be available. Several options are available only if the search has been previously saved, or if the search has not been saved.
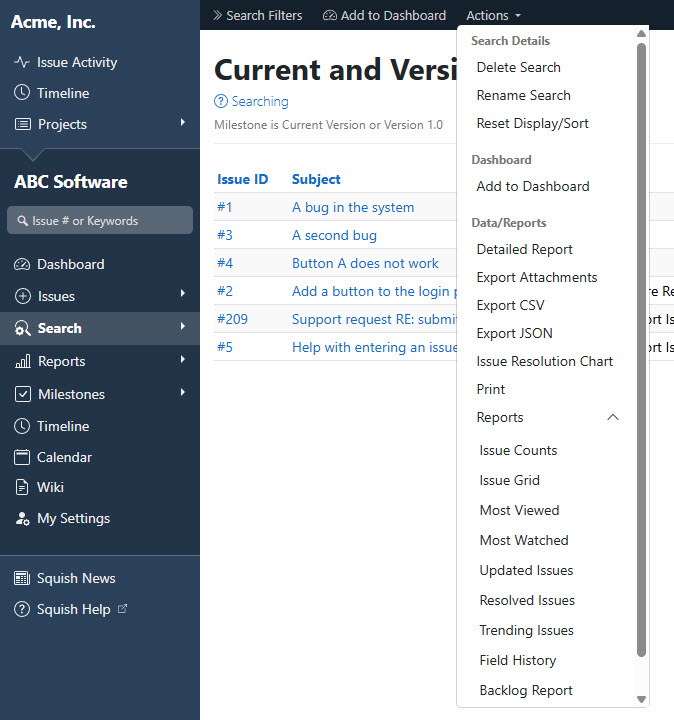
The following actions are available, if you have the necessary permissions:
Search Details
- Save Search - Only available for new and just edited searches. See Saving a Search for more information.
- Delete Search - Only available for searches that have been saved. Select to remove the search completely.
- Publicize/Unpublicize Search - Makes your search public to other project members. The search will be available in all project members project navigation bar search dropdown. Once a search has been made public, only the user who created it can unpublish it.
- Rename Search - Only available for searches that have already been saved. It opens the Rename Search page. Change the name in the text field and select Rename Search to save the new name.
- Reset Display/Sort - Resets the sort and displayed fields to the default.
Dashboard
- Add to Dashboard - Only available for searches that have already been saved but not added to your dashboard. Opens the dashboard settings page, where the search may be configured for display on the project's dashboard. You can enter the display type, width, and grouping field.
- Dashboard Settings – Only available for saved searches that are displayed on your dashboard. Updates display settings for your search.
- Remove From Dashboard - Only available for searches that are displayed on the dashboard. Removes the search from your dashboard but does not delete them.
Issues
- Mass Archive – Allows Administrators to archive multiple issues from the search simultaneously. A page opens where the user can check boxes next to the issues to be archived and press the Archive Selected Issues button. Archiving an issue removes the issue from regular searches and schedules it for deletion after an administrator-configured number of days.
- Mass Change - Only available for project managers. See Mass Change & Mass Delete for more information.
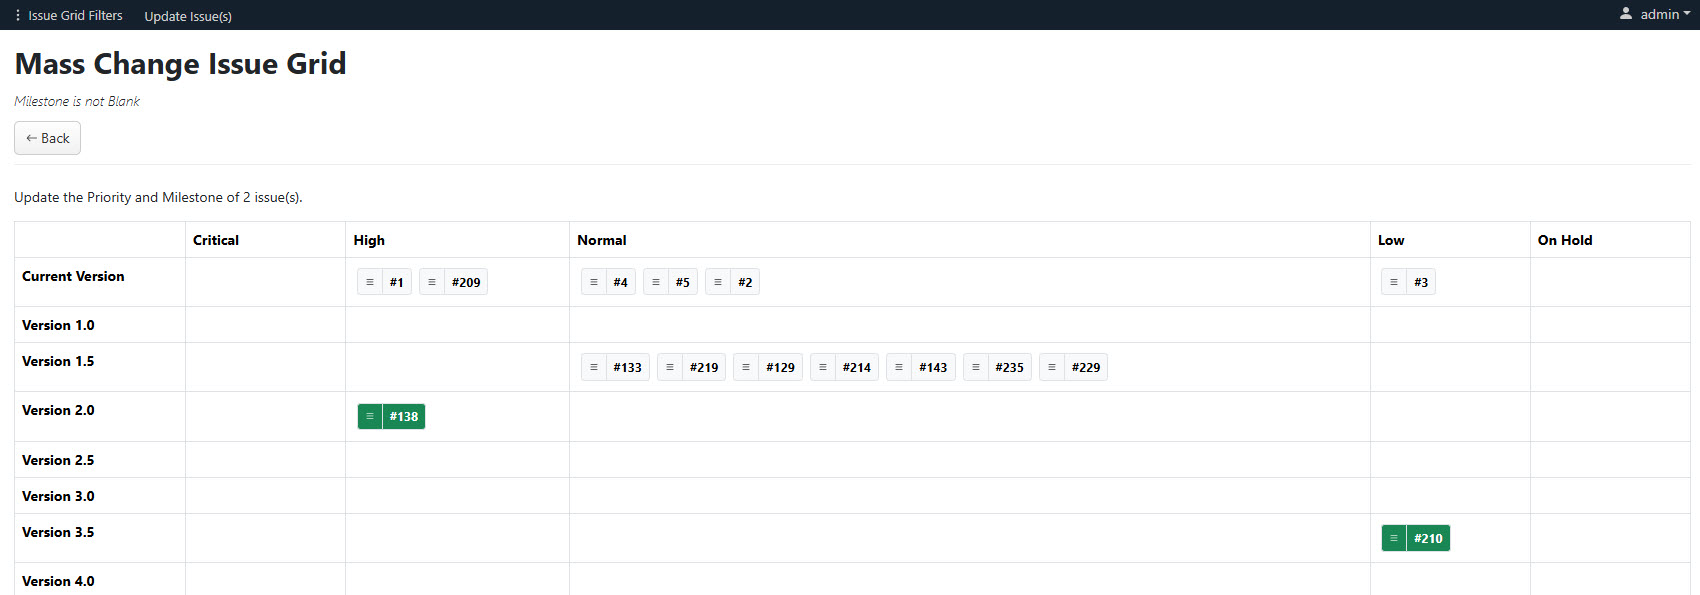
- Mass Change Issue Grid - A grid view will open, displaying each issue number in the cell it corresponds to. Select the fields whose values you would like to view from the Row and Column fields. Mark or unmark the Show Empty Rows/Columns box to hide/show rows and columns with no issues listed in them. Click on Update Grid. Each issue number will be displayed in the corresponding cell.
- Select the issue number to open the Quick Edit dialog for that issue.
- Click the handle to the left of the issue number and drag it to another cell in the grid to change the values of that issue for the displayed row and column fields. When finished, click on Update __ Issue(s). The number of issues which will be updated is displayed in the button title and the issues themselves are highlighted in blue on the grid.
- Note: this tool is only available to users who have permission to Mass Change issues.
- Mass Delete - Only available for project managers. See Mass Change & Mass Delete for more information.
Data/Reports
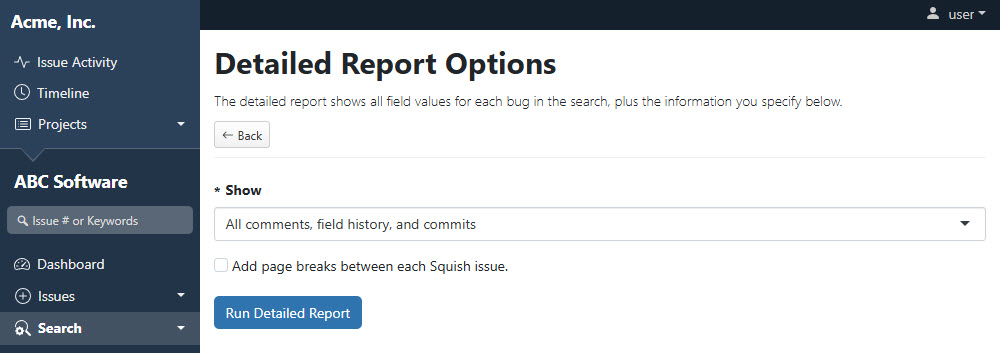
- Detailed Report - Will open the Detailed Report Options page. Select the detail option you want (All comments and field history, Comments, Field history or Description only), select whether or not you want to add page breaks between each Squish issue, and click on Run Detailed Report.
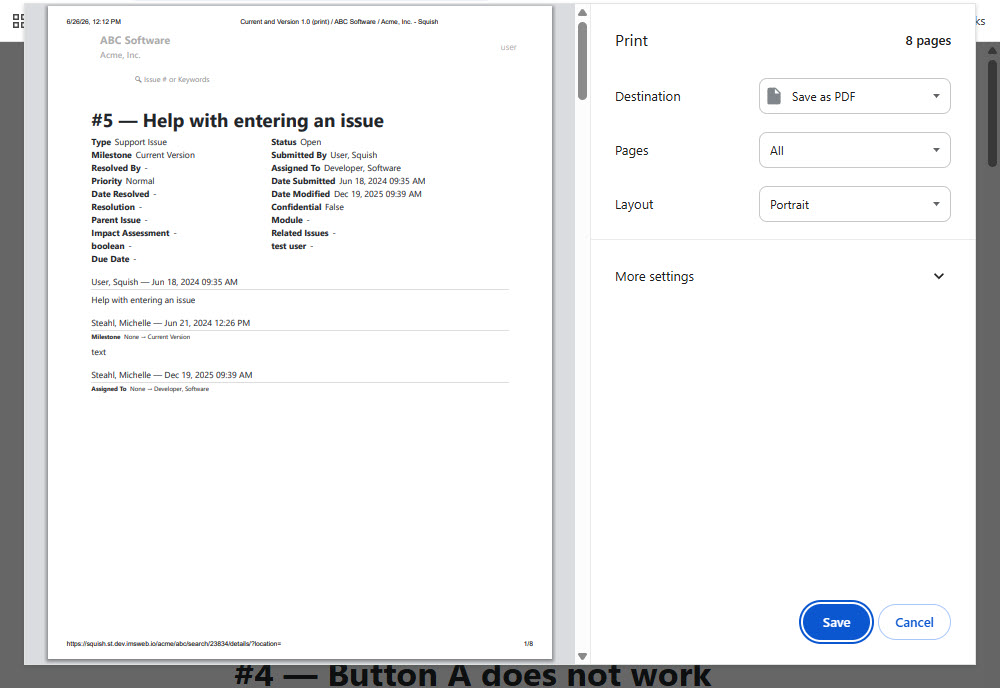
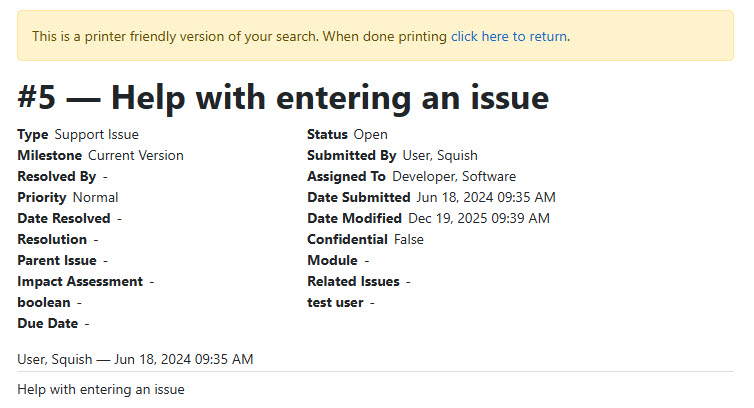
A printer-friendly report will open with the selected details of all the issues that were found in the search. Select Cancel to close the print dialog or select the Print button to print the page. Select click here to return to close the preview and return to the results table.
- Export Attachments – Will open a page displaying all issues in the search. You can mark the checkbox next to one or more issues, then select Export attachments. If any attachments have been added to any of the selected issues, then a zip file containing all attachments is downloaded. Attachments inside the zip file are organized into subfolders for each issue.
- Export to CSV - Will open the dialog allowing you to save the .csv file. You can choose to save it, open the file, or cancel the operation.
- Export to JSON - Will open the dialog allowing you to save the .json file. You can choose to save it, open the file, or cancel the operation.
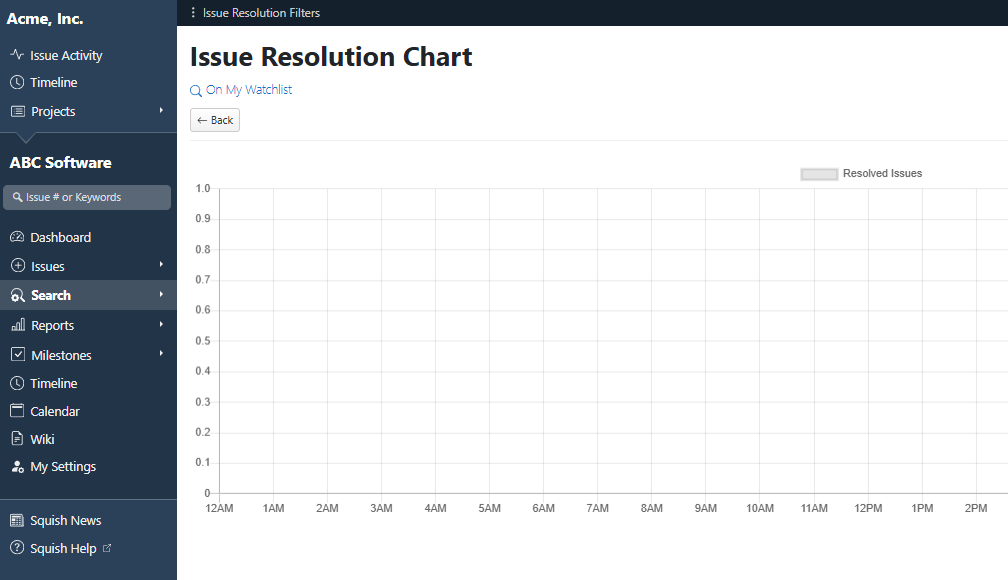
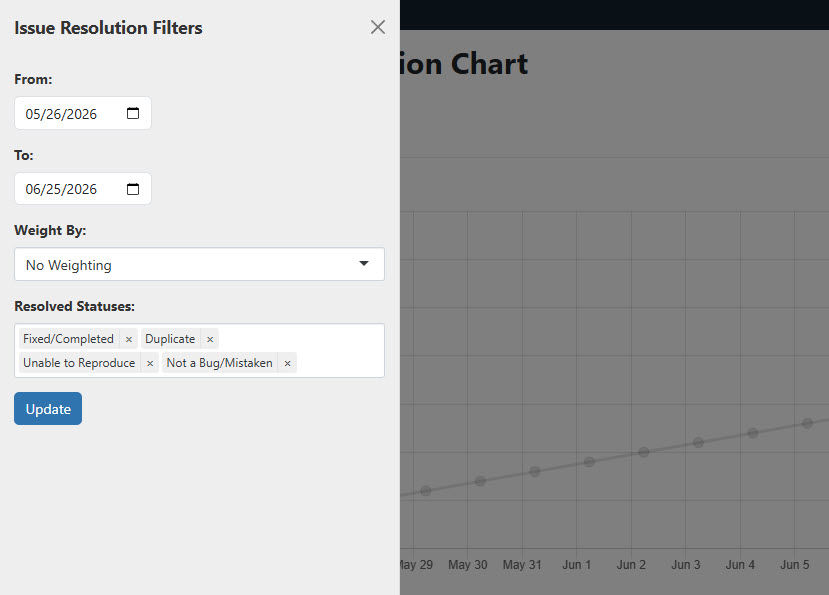
- Issue Resolution Chart - A burndown chart displaying issue resolution by day/time over a user-specified time period. Select Issue Resolution Filters in the top action bar to view chart options.
- Enter From and To dates to show issue resolutions for.
- Select a numeric type project field from the Weigh By dropdown. This will weigh the issues by the value they have for the selected field.
- Highlight the status values which will be considered resolved.
- Select Update. The chart will display the number of issues resolved over the timeframe selected, by day. Mousing over each data point on the chart will display the date and number of resolved issues
- Print - Will open a preview of the results in the browser and a print dialog. Either print or cancel. Select click here to return to close the preview and return to the results table.
- Reports - Opens the selectable list of statistics available in the Report menu. Any report opened from the Actions menu on a search will be restricted to the issues in that search by default.
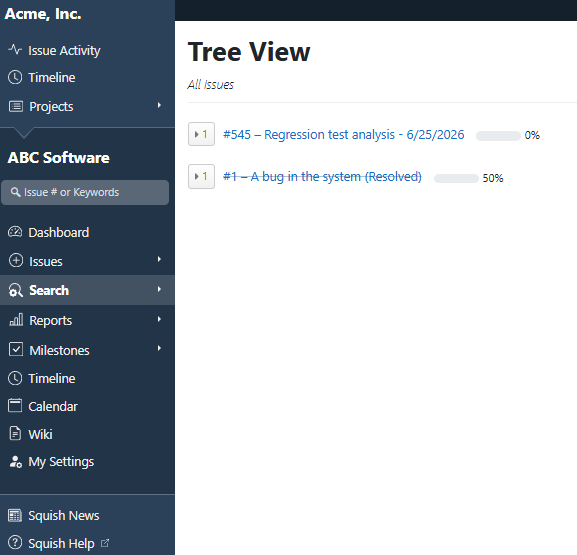
- Tree View - If any issues included in your search have a parent-child relationship established via the Parent Issue field, then this option will bring up a tree view of all the issues in that hierarchy.
- An arrow next to the highest parent displays the total number of issues created under this parent. Clicking on the arrow expands the list to show all direct children of the parent.
- Statistics for each parent show the percent of child issues which are completed.
- New Issue with these criteria - Only available under some circumstances. A menu will open where you can select one of the available issue types to create a new issue. After selecting one, a new issue for that type will open, where some fields will be defaulted based on your search criteria fields and values.
- For example, if you search on only a date value, then this option will not be available, since that value cannot be defaulted in the new issue. If you search on a date value and a Milestone, this option will be available to you, but only the milestone will be defaulted.